Tuesday, October 12, 2010

No Soup For You!

Just kidding! Fall is my favorite season, I love the cool weather, the colors and all the warm, comforting food. One of my favorites is soup... on a Sunday... watching football in my sweats... curled up on the couch... with a good book for half-time. Luckily for me, that's pretty much how I spent this past Sunday. Now, don't get me wrong, I love football Sundays filled with beer, wings, fried anything, and more beer. But sometimes, I just want to relax. And after a busy 2 months of completely booked weekends, that's exactly what I did. However, later on in the day, after Doug and I broke in our deep fryer with fish & chips (we'll save that for another day), I decided I want to make my own butternut squash soup.

So I searched around for recipes, found one I liked, and headed out to the store. My ingredients were all pretty cheap (luckily I had the spices on hand) and this soup made enough to last me all week! I was able to fill 5 tupperware containers, each with about 2 cups of soup in them - which for me, is great for lunch. The soup itself was also very easy to make, although my "mise en place" of all my veggies took some time - and left me with a blister on my finger (thank you butternut squash!). The soup came out delicious AND, it weighs in at only 159 calories per 1-1/4 cup serving. Not bad at all!

After I made this, I saw a post (I wish I remembered to save it), where someone served soup out of pumpkin bowls. I immediately loved the idea and thought this soup would be perfect for that! Just pick up the amount of small baking pumpkins (or acorn squash), cut the tops open for the bowl. Scoop out the seeds and all the fibers and sprinkle with a bit of sugar and salt. On a baking sheet, roast them for about 25-30 minutes at 400 degrees (longer for larger pumpkins). Viola! Not only will you have a great soup in a cool bowl, but no dishes to be washed when you're done! Also, for a larger group, you can use a larger pumpkin, pour in all the soup, put a ladle in and let your guests serve themselves. A great idea for Thanksgiving :)

Ok, now time for the recipe. I got this recipe from a Taste of Home Cookbook my mom bought me last year (it's my go-to cookbook and I would recommend it for all, buy it here). I actually changed a few small things, so below is the version I actually used.

Ingredients
1 c. Onion - chopped
2 Celery ribs (stalks) - chopped
2 tbsp. Butter
2 cans (14.5 oz each) + 2 tbsp. Reduced sodium Chicken Broth
1 tsp. Sugar
1 Bay leaf
1/2 tsp. Salt
1/2 tsp. Ground nutmeg
1/2 tsp. Ground turmeric
1/4 tsp. Ground cinnamon
1 Butternut squash (approx. 3 lbs) - peeled, seeded & cubed (this is how I got my blister)
3 Potatoes (medium sized) - peeled & cubed
1 1/2 c. 1% Milk

Instructions
1. Coat a large saucepan with cooking spray and cook the onion, celery and butter until the onions and the celery are tender.
2. Stir in the 2 cans of broth, sugar, bay leaf, salt, nutmeg, turmeric and cinnamon.
3. After about 1-2 minutes, add the squash and potatoes and bring to a boil.
4. Once it has come to a boil, reduce the heat, cover and simmer for approx. 20 minutes, or until the vegetables are tender.
5. Remove from the heat and cool slightly. Discard the bay leaf.
6. In a blender, puree the mixture in batches. (I held my pureed mixture in a bowl while I pureed in batches.) Return all of pureed vegetables to the saucepan.
7. Stir in the 2 tbsp. of broth and the milk. Heat through, but do NOT bring it to a boil.

This recipe yields approx. 10 cups of soup, and thanks to Taste of Home, there is nutritional information for each 1 1/4 cup serving:
Nutritional Analysis: 1-1/4 cups equals 159 calories, 4 g fat (2 g saturated fat), 10 mg cholesterol, 487 mg sodium, 29 g carbohydrate, 6 g fiber, 5 g protein.


Enjoy! Here's a picture of my finished soup (not plated though since it went straight into tupperware):

Wednesday, August 18, 2010

Fruit Bar

Remember in college when you would soak oranges and watermelons in vodka so you could enjoy some nice fruit while pre-gaming? Well, this is the more mature version of that. Macerated fruit served over pound cake, topped with whipped cream and chocolate shavings. Macerating, or soaking the fruit in liquid infuses the flavor of the liquid into the fruit. With fresh fruit, the most common way to macerate is to sprinkle some sugar on top, pour the liquid in and let it sit for an hour or so - that's it! This is a great dessert, especially in the summer, and is so simple to make. It's also perfect for group gatherings. You can simply make the pound cake, slice it or use a biscuit cutter to make individual sized cakes, set up bowls with different fruits, whipped cream and chocolate shavings to allow everyone to make their own a dessert. And because it's so easy, you can make a few different options in no time. For the pound cake, you can either make your own or buy one already made. I included a recipe below, but you can always substitute it with your favorite. Also, you'll see below that the technique for all of these fruits is pretty much the same, so go ahead and make up your own! Enjoy!

Pound Cake

Ingredients

1 pound/2 cups (4 sticks) butter, plus 1 tbsp.
1 pound/2 cups cake flour*, plus 2 tbsp.
1 pound/2 cups sugar
9 eggs (at room temp.)
1 tsp. vanilla extract
1/2 tsp. salt

Instructions

1. Preheat the oven to 375 degrees.
2. Using the extra tablespoon of butter, butter two 9x5 loaf pans. Use the extra 2 tablespoons of flour to dust them.
3. Cream the butter and the sugar together (about 6 minutes on a medium speed). Scrape down the sides of the bowl.
4. Add eggs one at a time, making sure each egg is fully mixed in before adding the next.
5. While continuing to mix, add the vanilla and salt.
6. Slowly add the flour into the bowl, while still mixing.
7. When fully mixed, mix for about 30 seconds more. Then divide the batter evenly amongst the 2 pans.
8. Bake for approx. 40 minutes or until the crust is golden brown but the crack in the middle will appear moist. The cake should spring back if you press it.
9. Allow to cool, then slice. If you want to make individual round cakes, you can slice it, then use the biscuit cutter in the middle of each slice.

Sliced Oranges with Grand Marnier

4 naval oranges
1 tbsp. sugar
1/4 c. Grand Marnier or other orange liqueur

1. Cut oranges in half and peel using a sharp knife. Be sure to remove all the orange rind and the white pith.
2. Cut the orange into segmants. Do this by slicing along its divided membranes. Place in a bowl.
3. Sprinkle the sugar over the oranges and pour the Grand Marnier over the pieces.
4. Allow the oranges to sit for at least 1 hour before serving.

Raspberries in Red Wine

2 cups raspberries (rinsed)
Sugar
1/2 cup red wine (pick your favorite!)

1. Put the raspberries in a bowl and sprinkle with sugar (to taste).
2. Pour the wine in and let macerate for at least 1 hour.

Strawberries Romanoff

2 cups strawberries (washed, hulled and halved)
1/2 c. fresh orange juice
1/4 c. Curaçao or other orange liqueur

1. Place strawberries in a bowl and add the orange juice and Curaçao.
2. Let sit for 2-3 hours.

Peaches with Marsala

4 ripe peaches (chilled)
Sugar
1/2 c. marsala wine

1. Peel and slice the peaches.
2. Sprinkle sugar over peaches (to taste) and pour the wine over the peaches.
3. Serve immediately*

*Yes I realize this isn't macerated, but it still tastes good!

A recipe for homemade whipped cream can be found here.

For chocolate shavings, just grab a chunk of chocolate and take it to a cheese grater. It's very simple but adds a nice touch.

Your guests can make something that looks like this:

Sunday, August 15, 2010

Crunch!

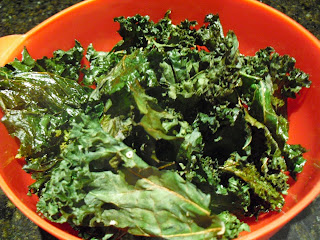
While bikini season is almost over, I still have a few more weekends that require me in a bathing suit. Only problem is, my desire to look good in a bikini directly conflicts with my love of chips, popcorn, crackers, pretzels and crunchy snack foods in general. For some reason, when I crave junk foods, I don't crave a specific flavor, instead, I know I want something that will crunch. So when I heard about kale chips, I was intrigued. Do they really get that crunchy in the oven? And even if they do, will they even taste good? Kale is extremely nutritious and filling, so if this will work as a yummy, crunchy snack, I can munch on them guilt-free! So, on my way home from work before the weekend, I stopped by the store and picked up some fresh kale, and was ready to go. Making the chips was pretty quick and very easy. They did crisp up and prove to be very tasty! Doug said they "weren't his thing," but what does he know anyway? I enjoyed them. After making them, I read some other recipes/reviews online, and found that if you leave them in the oven for too long, they will become so crispy that they crumble and fall apart. While my chips didn't fully crumble, after biting into them, some of them made a bit of a mess with all the crumbs. So now, I'm thinking perhaps I should've removed them from the oven a minute or two earlier. However, they were still very enjoyable. I also read that some people like to add more flavoring, such as cheese or garlic, which sounds like it would be delicious. While I don't think you need the extra flavors, I do agree that it would probably taste very good.

All in all, I was happy with the result. One head of kale made a lot of chips, so come Sunday, I was still snacking away on them (fyi - I didn't keep them in the fridge, just in a bowl with seran wrap, a ziploc bag would work fine too). See below for recipe & photos. Crunch away!

Kale Chips

Ingredients
1 Head of kale
1 Tbsp. olive oil (I didn't measure this, I just used enough to be able to toss all the leaves in it)
Sea salt to taste

Instructions
1. Preheat the oven to 300 degrees.
2. Cut the Kale off of the stems and tougher rib areas. Cut into manageable, chips size pieces. Wash with cold water and run through a salad spinner. Make sure leaves are dry.
3. In a large bowl, toss the kale in with the olive oil.
4. Spread the coated kale on to a baking sheet in a single layer. Sprinkle sea salt over the pieces (as much or as little as you like).
5. Bake for about 20 minutes or until crisp and the edges start to brown. Enjoy!

Right out of the oven...


And into the bowl!

Thursday, August 12, 2010

The Help

The novel written by Kathryn Stockett, The Help is set in 1960's Jackson, Mississippi and explores the very common practice of black women being maids in white households. The story is narrated by three different characters, as described below:

Aibleen - a middle-aged black maid who recently lost her only son. She has raised 17 white children in her life, and becomes very devoted to her most recent white child. She raises these children as if they are her own, even though they eventually reach a certain age where they realize she is "the help" and break her heart.

Minny - Aibleen's best friend, she is a short, fat and sassy black woman. She is known to be the best cook in Jackson, but has yet to learn the ability to bite her tongue. After losing her job and her reputation is ruined, she eventually finds a new one when a new woman in town has not heard of her.

Skeeter - a young white woman who recently graduated from Ole Miss, but instead of a ring on her finger, she has an English degree. She doesn't quite fit in with anyone who should be in her friend group and has dreams of becoming a writer. Urged on by a female editor in NY, she begins to document the stories of maids that are working in Jackson.

These three intertwining stories come together and the reader sees how much "the help" play an important role in the 1960's Jackson. Through Skeeter's research and interviewing the maids, we learn that some are appreciated and loved, while others are made to use a separate bathroom in the garage. We also get a good sense of the racial tension, when we read about the fear the maids have of being found out, and even the risks Skeeter goes to maintain the confidentiality of the interviews and the maids. And all while exploring a dark section of our nation's racial history, Kathryn Stockett manages to keep the book laugh out loud funny.

Now for the fun part... what to serve for a themed book club meeting! This book was chosen by Moira and she hosted the meeting for it. It was her great idea to make all the food served at the meeting themed with the book. She served us some fried chicken tenders, mac & cheese, and even enlisted my help to make a chocolate pie (once you read the book, you will understand the importance)! Here are the recipes, as well as some other menu ideas you may want to look into:

Fried Chicken Tenders - these were quite possibly the best homemade chicken tenders I have had. Instead of using a whole chicken and butchering it, Moira opted to use boneless, skinless chicken breast that she cut in strips. This recipe calls for self-rising flour, which if you can't find or don't have can be substituted with all-purpose flour by adding baking powder and salt to it (1 c. self-rising flour = 1 c. all-purpose flour + 1-1/2 tsp. baking powder + 1/2 tsp. salt). The recipe can be found here.

Mac & Cheese - this dish is made in a slow cooker and sits for 3 hours to become absolutely creamy and cheesy. Great for bigger groups, as the recipe yields 12 servings! Also, because it's in the slow cooker, it's a nice set & forget it dish, allowing you to concentrate on other menu or drink items. Recipe can be found here.

Fried Pork Chops - Minny gives lessons to her newest "white lady," in hopes of teaching her how to cook. One of the things she teaches her is fried pork chops, and it's crazy to me that someone wouldn't be able to learn this! Another Paula Deen recipe, here's a simple way to do fried pork chops.

Biscuits - what southern meal would be complete without a nice, warm biscuit? You can take the easy route and just buy the ones you pop out of a can and toss in the oven. If you don't have time to make them, it is a great shortcut, that tastes delicious. If you prefer to make your own, here's a classic biscuit recipe.

Caramel Cake - in the book, Minny is known for her caramel cake and has gotten jobs off of her skill. Here's a recipe to try to see if you can compete with the cake that was the best in The Help's Jackson, Mississippi.

Chocolate Pie - the chocolate pie Minny bakes, comes to play an important role in the story. This is the recipe I used and it came out delicious. I think Minny would be proud!

Some other ideas are: fried okra, deviled eggs, butter beans, and a peach cobbler. Have fun with it!

Now, as far as drinks go, most of the drinks mentioned in the book are non-alcoholic. They are Tang, Tab and iced tea. If you're meeting is alcohol-free, go with those. Personally, our meetings are never alcohol free. So here's some fun ways to play up the theme.

Wine - When I think about the bridge club woman in the book, I think they would be drinking white wine spritzers. I also seem them enjoying a fruity, sweet Riesling. Either way, I would choose white wine, as I can't see red wine (normally served at room temperature) being a drink of choice in the hot weather of Jackson.

Sweet tea vodka - Firefly is a popular one, but there are others out there. This is vodka that has been infused with sweet tea. You can drink it on the rocks if you like, but I usually mix it with some lemonade and then water to dilute it a bit.

Tab - Tab is a diet cola drink made by Coca-Cola. If you can find some, and want to make it alcoholic, mix it as you would Diet Coke.

Scotch - The woman in Jackson were not drinking scotch, but the men were. In fact, on one of Skeeter's dates she is turned off by the amount of Scotch her date drinks. If you can handle it, pick up some of your favorite brand and dive in. Personally, my favorite is Macallan 15, but I wouldn't drink that for book club.

These are just a few suggestions and I would love to hear any other ideas you have. Hope you enjoy the book, food & drink!

New Idea!

I along with baking and cooking, I also love to read. You may have noticed, I have had a link for "what I'm reading" up for a while, which usually had a 1-2 sentence summary and a link to purchase the book. For the past year I have been a member of a book club, that consists of about 8 of my good girl friends. Our meetings are held once a month, and at them we talk about the book, eat, & drink wine.

It wasn't until I was planning last month's meeting at my apartment, that the idea to combine my food, drink and reading love hit me. Perhaps it was because I chose a book about a woman attending culinary school and she is awesome and happened to insert a "menu guide for book club" at the end, but I felt like there should be something, somewhere that brings books to life through food & drink. And that is what I hope to do. I will start off by first reviewing some of our previous books, giving a quick summary/review of the book and then offer menu ideas. Our book club has done book-themed meetings before, so I will start off with those. I will label/tag all of these posts "book club" so they are easy to access. Also, now on the side instead of the "what I'm reading" link, you will find clicking on the book will take you to my post about it. Enjoy!

Tuesday, July 20, 2010

Healthy, Summer Turkey Burgers

Summer in NYC this year has been HOT, I mean, way hotter than any other summer I can remember. Living in an apartment, it makes turning on the oven painful. Even having the stove on seems to make our living room feel 20 degrees hotter. While dreams of a backyard growing fresh herbs and vegetables, a giant grill and outdoor kitchen set up dance in my head, I have still been cooking and baking in the apartment, just not as often as I would like too. To make it better, I have been choosing meals (and the occasional treats) that are faster to make. One of those things, is turkey burgers.

Normally, when Doug and I make burgers, he handles it. He is a man, he cooks red meat while his Gears of War video game is paused, that's what men do. Or so he tells me. I usually have no objection to this, as I lay on the couch, read and then just eat what is presented to me. He does make an awesome burger. But this time, I wanted to do it. I had caught part of a Rachael Ray episode over the weekend where she made turkey burgers with fresh herbs and I was inspired.

So on the way home from the gym (I find that the best time to go food shopping, I only want healthy things!), I stopped at the grocery store to pick up my ingredients. I picked up great whole wheat buns, as well as 93% lean ground turkey, which I would have liked to go leaner, but the selection at the store was not the best. For my fresh herbs, I decided to go with parsley, cilantro and dill. I felt the citrus-y flavor of cilantro will also bring out the subtle citrus & sweet flavor in the dill, and the savory parsley will be a nice addition to it. For your herbs, feel free to choose what you like best!

Because ground turkey is lean, it is easy to let it dry out when cooking. That is why you want to add a lot of fresh herbs, they will help keep it moist. For the 1.3 lbs of ground turkey, I added a little less than a 1/4 cup of each chopped herb. Also, to maintain moisture, I added a tablespoon of dijon mustard. Sprinkle with salt & pepper and mix it up - mix enough so everything is incorporated, but then do not keep mixing. Form the patties (I was able to form 6 decent sized patties) and throw them on your grill - or in my case, grill pan*! I served them with a slice of vegan cheese (mozzarella flavor), on the whole wheat buns I bought, with a nice slice of tomato. The whole burger had a fresh, crisp feeling to it, perfect for a hot summer day! Also, since it was only Doug and I eating, I saved the extra patties by wrapping them in plastic wrap and putting them in the fridge. If you want to reserve them longer than 3 days (that's my limit), put them in the freezer instead.

*Before putting on the grill pan, make sure it's hot! Also, I pour some vegetable or canola oil on a paper towel and use to spread over my grill pan so it is very lightly greased.

Some patties before they hit the grill:


After a bite or two:


Thursday, June 10, 2010

DIY: Granola Bars

I found this recipe a while ago, when looking up treats that featured peanut butter for a LOST party. Before that, I had never realized how easy it was to make your own granola bars. These are great for snacks or a on-the-run breakfast. They will also stay for at least a week if in sealed package. This recipe was a Giada recipe that I slightly altered after reading some reviews:

Peanut Butter Granola Bars
Ingredients
-Vegetable cooking spray
-1 Egg white
-1/2 cup Chunky peanut butter
-1/3 cup Brown sugar
-1/4 cup Honey
-5 Tbsp. unsalted butter*, melted
-2 cups Old fashioned oats
-1/4 cup Slivered almonds
-1/3 cup Miniature chocolate chips

Instructions
1. Preheat oven to 350 degrees and position oven rack in the middle.
2. Spray a 7 x 11 baking pan with the vegetable cooking spray. Lay parchment paper in the pan, allowing excess paper to hang over the sides. Spray the paper lightly with the vegetable cooking spray.
3. In a medium bowl, beat the egg white until frothy. Stir in the peanut butter, brown sugar and honey. Add the melted butter, oats and almonds. Stir to combine, and then add the chocolate chips.
4. Spread the mixture into the prepared baking pan with a rubber spatula. Press lightly to form an even layer. Bake for approximately 15 minutes, when the edges begin to brown.
5. Remove from the oven and let cool for at least 1 hour. When thoroughly cool, cut and serve.


*If not stated, use unsalted butter in baking recipes. This way, you are controlling the salt in the recipe, not the company that processed your butter.

Saturday, May 29, 2010

East Meets West Coleslaw

In my previous post, I posted the recipe that my friend Moira and I created for braised pork to celebrate LOST. Well here is another recipe that I served at the Lost party. This coleslaw was the easiest dish to make and was absolutely delicious. I would definitely recommend it for a summer barbecue.

Ingredients
-1/2 Head of purple cabbage, shredded
-1 c. Slice almonds
-2 pkgs. Ramen noodles, broken up
-1 bunch Scallions, chopped (add to your discretion)
-1/2 c. Vegetable oil
-2 tsp. Toasted sesame oil
-1 Tbsp. Soy sauce
-1/3 c. Sugar
-1/4 c. Rice vinegar
-2 Season packets from Ramen noodles (chicken flavor)

Instructions
1. In a large bowl, combine the cabbage, almonds, Ramen noodles and scallions.
2. In a medium bowl, whisk together the vegetable oil, sesame oil, soy sauce, sugar, rice vinegar and Ramen seasoning packets.
3. Pour the dressing over the dry ingredients and toss. Let sit for a few hours.

I didn't take picture of it that night in the bowl, so here's a picture of the leftovers:

Wednesday, May 26, 2010

Braised Pork for LOST

As huge fans of the show LOST, Doug and I have hosted a few viewing parties for episodes. Well, this past Sunday was the season finale, so we invited our fellow Lost fanatics over and sent the show off in style. My friend Moira and I planned out a whole menu which included items such as: Jin's Steamed Mussels, Mr. Cluck's Popcorn Chicken, Locke's Braised Pork, East Meets West Coleslaw, and Generic Character Rice Pilaf. All week long I food shopped and prepped ingredients, because we would only have about 3 hours to prepare everything. Unfortunately, Moira got called into work and was unable to attend, but luckily enough, we had discussed our menu so thoroughly that I knew exactly what needed to be done. I was stressed out making all of this food on my own, especially in a 3 hour window, but in the end, I pulled it off. It goes to show you that planning and preparation really do pay off. Here's one of the recipes that Moira and I collaborated on to create, based on a braised lamb shank recipe we had. In honor of Lost, we changed it to pork (close to a boar, right?) and used pineapple juice instead of wine as our acid. We also threw in some cinnamon and a splash of rum. Some of the portions of ingredients are estimates and with the all the rushing around, I forgot to take pictures. Try it out and feel free to play with the spices you put in!

Locke's Braised Pork
Ingredients
-Package of sliced bacon
-Pork Shoulder/Butt (I used approx. 5 lb pork butt roast)\
-Salt and Pepper for seasoning the pork
-1/2 cup Carrots (chopped, about 1/4 inch)
-1/2 cup Celery (chopped, about 1/4 inch)
-1/2 cup Onions (chopped, about 1/4 inch)
-1-2 Garlic cloves, chopped
-6 oz. Pineapple juice
-2 Cinnamon sticks
-2 Star Anise
-3-4 Sprigs of Thyme
-4 cups Chicken stock
-1 oz. Rum (I used Bacardi Silver)

Instructions
1. Preheat oven to 325 degrees.

2. In a large, oven proof pan (not too big, but large enough to fit the meat and be covered), add the bacon and turn on high heat. When the bacon has produced enough grease to coat the bottom of the pan, remove the strips. Feel free to fully cook the bacon if you are going to use it in something else later one, personally, I discarded mine.

3. While the bacon is cooking, season the pork with salt and pepper. After removing the bacon from pan, put the pork in. Brown all sides of the pork. It is important to get the color that you want during this step because once the acid is introduced, the meat will no longer brown. The browning is also carmalization of natural sugars, so it will add to the flavor of your meat.

4. When the meat is sufficiently browned on all sides, remove from pan and reserve on a dish.

5. Reduce the heat to medium. (If the fat/grease has burned, discard and add 3 tbsp of vegetable oil.) Add in the carrots, celery, onions (which is also known as "mirepoix") and garlic. Sauté for 5 - 7 minutes, until they are lightly browned. Do not allow to burn (add more oil if necessary).

6. Add the pineapple juice and deglaze the pan by scraping the bottom with a wooden spoon. Bring to a boil.

7. Remove from heat and add the cinnamon sticks, star anise and thyme. Place the pork back in the pan. Add the shot of rum and pour in chicken stock until the pork is 1/2 way covered.

8. Cover and place in the oven for 1.5 hours. If your cover does not seal completely with your pan, place a sheet of aluminum foil under the cover to create a better seal. Remove the pan from the oven, flip the pork and place it back in oven for another 1.5 hours.

9. After the 3 hour cook time, the pork should be done. Use a meat thermometer to be sure, the thickest part should reach 160 degrees. Place on a heated plate and cover with with foil.

10. Pour the juices through a fine mesh strainer and press down with a wooden spoon to extract all juices from the vegetables. Return the juices to pan and place on high heat. Reduce the juices by half, skimming the surface with a ladle or straining spoon to remove any excess fat.

11. Cut up the pork and pour the sauce over it. Enjoy!

Monday, May 24, 2010

Margaritaville

As summer comes closer, I find myself unable to resist the urge to sit outdoors and drink margaritas. Personally, I prefer the original lime margarita on the rocks, although the frozen ones just scream summer. I used to think those were my two options to enjoy a margarita, that is until my book club decided to have a meeting on Cinco de Mayo. Being the baker of the group (by force), I had my heart set on making margarita cupcakes. I wasn't quite sure how I would make them or what they would taste like, but I was determined. After spending a week looking up recipes for the cake and frosting, I could not find a cake made from scratch that sounded good. Almost all of the cupcake recipes I found were based on a box of white cake mix. So finally, I decided to take the lazy way and use the boxed mix. The cupcakes, which I did in mini-muffin pans and add food coloring to, ended up tasting great. They were very light and the lime flavor went nicely with the sweetness. I was originally determined to create my own recipe from scratch, but after eating these and getting numerous compliments, I will probably not change it. As for the frosting, I used a simple vanilla buttercream that I had already made earlier in the week. The next time I make them though, I will use a whipped cream for frosting to keep the cupcake very light. I recommend you try different frostings and see what you like best, mine will probably be one spiked with tequila! Below I provided the cupcake recipe, as well as a whipped cream recipe and pictures. Enjoy!

Margarita Cupcakes
Ingredients
-1 Box of white cake mix (I used Pillsbury Moist Supreme Classic White)
-1 cup Margarita mix (room temp.)
-1/4 cup Tequila (room temp.)
-3 Egg* whites (room temp.)
-2 tbsp Vegetable oil
-Lime zest from 2 limes

Instructions
1. Preheat the oven to 350 degrees.
2. Prepare muffin/cupcake tins either with paper cups or by greasing them.
3. In a medium bowl, mix together the margarita mix and the tequila.
4. Whisk in the 3 egg whites and vegetable oil.
5. In a large bowl, combine the cake mix with the lime zest.
6. Slowly beat the wet ingredients into the dry mixture. Once combined, continue to beat for 2 - 3 minutes (this is where you can add food coloring if you desire).
7. Distribute the mixture evenly amongst the cupcakes.
8. Bake for approximately 18 minutes, or until the cupcakes have puffed up and are a light, golden brown on top. You should be able to poke the surface and have the top bounce back.
9. Allow the cupcakes to cool before frosting.

Homemade Whipped Cream
Ingredients
-8 oz. Heavy cream
-1/4 cup Sugar
-1 tsp. Vanilla extract

Instructions
1. In a chilled bowl, using a chilled whisk, whisk the cream until it begins to stiffen.
2. Add in sugar, to taste (you may not use the full 1/4 cup) and any flavorings, like the vanilla extract.
3. Whip only until soft peaks start to form. Take care not to over whip.


Half-eaten cupcake at work:
Bad lighting, but yummy cupcakes:
Fun colors for summer celebrations:


*When not specific, eggs in a recipe call for large eggs. Extra large eggs are 25% larger, jumbo eggs are 50% larger and therefore throw of the balance of fat and protein. This doesn't make much of a difference in your omelets, but could impact your baked goods.

Monday, May 10, 2010

Want some 'za?

When it comes to a lazy, quick dinner, pizza is one of the first things I think of. It's so easy to run across the street and grab a slice, but it's also just as easy to make your own - and that's exactly what Doug and I like to do. Normally, if I think far enough in advance, I like to make my own pizza dough on my picture-perfect KitchenAid (a year into my relationship with it and I'm still in love!). However, sometimes I can't wait the hour plus it will take. And that's the mood I was in when we decided to make pizza the other night. So instead, we went to our grocery store and purchased Boboli's large, thin crust whole wheat pizza. Next we had to decide on what we were going to put on our pizza. This is always a pretty long debate since Doug will eat anything and I can't make a decision. Eventually, we decided to make a "sausage and peppers" pizza. So we also picked up some Boboli pizza sauce, an Italian six cheese blend, hot Italian sausage, green peppers and an onion.

Upon returning home, we took out our frying pan, heated it up, dropped some oil in and got ready to brown the sausage. Instead of just slicing the sausage, I decided I wanted it "crumbled" on top, so using a paring knife I sliced open the sausage casing and dropped the meat into the hot frying pan. Then we just used a wooden spoon to mash it up. We turned on the oven and while Doug oversaw the sausage (he thinks meat is the man's job), I chopped up the pepper and onion. Before we knew it, the oven was hot, sausage brown, vegetables chopped. All we had left to do was assemble, put it in the oven and eat!

So on a large, flat cookie sheet, we put our crust down. On top went the sauce, the sausage, the peppers and the onions. Then we added cheese until we were satisfied. We put it in the oven, opened a beer and 10 minutes later...

*When chopping up vegetables for the pizza, you can make them as big or as little as you want them. I prefer short strips of peppers and onions, so after slicing them vertically, I then just cut them horizontally in the middle, making each piece about 1 inch long.

**Upon reflection, I also blogged about pizza back in May of 2009, almost exactly a year ago. If you go to that post, I have a recipe for homemade pizza dough, try it!


Thursday, May 6, 2010

Self-Promoting!

Back in high school, my Great Aunt Marie gave me her recipe to make Italian tri-color cookies or as I like to call them, rainbow cookies. These cookies were going to be my first baking experiment on my own. In fact, the first time I made them, it took about 2 and half hours just to get them into the oven! They were challenging and made a mess of my mom's kitchen, but I loved them. As it turns out, I actually made 2 mistakes and botched the recipe. However, those cookies did not taste like a mistake. In fact, I made the recipe my own by changing it so now every time I make those "mistakes." I have been making these cookies for close to ten years now and have perfected them. These cookies have been requested at birthdays, bridal/baby showers, anniversaries, and holidays (I'm still waiting for a wedding!). Up until recently, I have only made them for family and close friends as a gift to them, but now, I have decided to sell them. So, if you would like to try my almond, raspberry, tri-color cookie, feel free to contact me at angelamarino22@gmail.com

The color looks off in this picture, but here's a batch before it's frosted and cut up:
One pound, approx. 24 cookies:

*Also, I have experimented with colors and customized them for specific events, ie pink & white cookies for a baby shower. I also plan on experimenting with the filling for the layers in between the cake, so if you're interested or have any ideas, leave a comment or send an email!

Wednesday, May 5, 2010

Rolling with the Homies


Doug and I both love sushi. Awhile ago, I suggested we take a class and learn how to roll our own sushi rolls. We talked about it a few times, but never seriously looked into it. Well, luckily for us, ESPN decided to offer "Sushi 101" to their employees for only $35 a person. We signed up and bought some wine that we paired well with sushi (the class was BYOB). Finally, the day of our class came and it couldn't have been better. In a sectioned off area of the cafeteria, there was a U-shaped table set up for us to sit at. Each person had a rolling mat, cutting board, chopsticks and glossary of common Japanese words associated with sushi. The class of about 20 was lead by sushi chef for the building, and two sous chefs. I really wish I could remember their names to say how amazing they were, but it was a few weeks ago and I really can't remember. After uncorking all of our wine and introducing themselves (maybe that's why I can't remember their names, I was distracted by wine!) the head chef opened up the class by teaching us what to look for when picking out a fresh fish. He pulled out a salmon he purchased earlier that day at Wild Ediblies, in Grand Central Market. Here are his pointers on making sure you get a good quality fish:

1. Make sure the eyes are bulging. If the fish's eyes are sunken into it's head, it means it has been sitting out of water for a long time.
2. Look at the gills, they should be a bright, vibrant color. The duller and browner they are, the longer it has been out of water.
3. The fish should be firm to the touch. If you touch it and your fingers do not meet resistance, you don't want it.
4. If it smells bad, it is bad.

After teaching us how to pick out a fish, our head chef showed us how to fillet the fish. I will not attempt to explain how to fillet fish here, as I think I would butcher (hehe) the explanation. However, I did learn that the best part of the fillet is the meat closest to the head. Also, if you fillet the fish yourself, be sure to pull out all pin or rib bones - in a salmon there are 32, if I recall correctly. It was great seeing this chef fillet the salmon so easily, but I think for now I will have a fish monger do it for me until I'm confident enough in my filleting skills.


After the fish demonstration, our chef taught us about sushi rice. Sushi rice is a higher quality grain of rice and is prepared in a special way to make it sticky. Our chef provided all the students with rice, but also demonstrated how to make it. Here is the recipe we were provided with:

Vinegar Mixture:
5 parts rice vinegar
4 parts sugar
1 part mirin
1 part salt
Dast of kobu

Rice:
16 oz. sushi rice, rinsed twice with water
16 oz. water

-Place the rice into a rice maker with the 16 oz. of water and cook until done.-
-Mix the cooked rice with the vinegar mixture (5 parts rice, 1 part vinegar). Stir until liquid is absorbed.

What's important to remember when working with the sushi rice, is to keep your hands wet. We used a bowl of water to dip our fingers/hands in before we picked up our rice. We then shaped our rice into a ball. The ball of rice should fit into your palm. We then took our ball and touched a stack of nori with it. The rice stuck to it so it lifted up the first sheet. We placed it on our rolling mats and then began to spread the rice out. Once the rice was covering the nori, we sprinkled some sesame seeds and flipped the whole thing over so the rice side was down. Now it came time to create our rolls.

The class provided all of us with a plethora of ingredients. It's important not to stuff the rolls with too much, they won't roll and close nicely. When rolling, it's important to tuck the end in and keep it tight. Once it's "sealed" we placed the roll so then end lined up with the edge of the rolling mat and rolled it up tightly and pushed any extra stuffing into the roll. We did the same for the other side. When it was all done and rolled tightly it was time to cut them up. A slice down the middle, then line them up one on top of the other, and two more cuts. Flip them sideways and you have your rolls. The only thing left for us to do was to eat them! Overall, the class itself was great and we enjoyed ourselves. We learned a lot and ate a lot. We finished the night off with a glass of sake and took our tools, experience and rolls with us! See below for pictures.

Ingredients: Seared tuna, crab, shrimp, salmon, tuna, yellowtail and on the other side: wasabi, ginger, seaweed salad, cucumber, avocado, crab salad and spicy tuna
The rice spread over the nori:
With seared tuna and avocado, pre-rolling:
Just rolled it up
All cut up and ready to eat!
Tuna and seaweed salad, ready to be rolled:
Rolled up, cut & ready to eat!
A salmon roll we made:
Quick and easy sushi ice cream cones!

That's only about half of the rolls I made, the other half had already been eaten!

Tuesday, May 4, 2010

Ebony & Ivory

This post is dedicated to the famous New York City Black & White cookie. The cookie, pictured below, is a wonderful creation in which, as Jerry Seinfeld puts it, "two races of flavor living side by side."


In the famous Seinfeld episode, "The Dinner Party," Jerry encourages Elaine to "look to the cookie" as a metaphor for race relations. So the way I see, the cookie is like my relationship, how can I not love it?! Although, I must admit, I find I usually eat the white side first, saving the chocolaty, black side for last. The cookie itself was created as a way for bakeries to get rid of leftover cake batter without throwing it out. By tweaking the cake batter a little bit, bakers created a delicious cookie, that is still soft and cake-like. Most bakeries frost it with fondant, you'll see below I used confectioners sugar and water, but the idea is that the frosting will dry hard. This is so when you bite into the cookie, you get the firm frosting mixed with the soft cookie.

I have always loved these cookies, but have never really thought of baking them. That is until I had the idea of making them for St. Patrick's Day and frosting them green and white. In the green frosting, I added white chocolate and food coloring, so the darker side of the cookie still had a chocolate taste. To the white side of frosting, I added a few drops of vanilla extract, to give it some more flavor other than confectioners sugar and water. I also must add, it was very hard to get these cookies into perfect circles. I assumed they would spread into nice circles as they baked, but that was not the case. I will attempt to make them again in the future (with the original black & white coloring), and will try to make better circles when placing them on the baking sheet. Below is the recipe I used, as well as pictures of my final product:

COOKIES
Ingredients:

  • 1 1/4 cups all-purpose flour
  • 1/2 teaspoon baking soda
  • 1/2 teaspoon salt
  • 1/3 cup well-shaken buttermilk
  • 1/2 teaspoon vanilla
  • 1/3 cup unsalted butter, softened
  • 1/2 cup granulated sugar
  • 1 large egg

Instructions:
-Preheat oven to 350°F.
-Whisk together flour, baking soda, and salt in a bowl. Stir together buttermilk and vanilla in a cup.
-Beat together butter and sugar in a large bowl with an electric mixer until pale and fluffy, about 3 minutes, then add egg, beating until combined well.
-Mix in flour mixture and buttermilk mixture alternately in batches at low speed (scraping down side of bowl occasionally), beginning and ending with flour mixture. Mix until smooth. (See my post below on Red Velvet cupcakes for why this is important!)
-Spoon the batter about 2 inches apart onto a buttered large baking sheet.
-Bake in middle of oven until tops are puffed and pale golden, and cookies spring back when touched, 15 to 17 minutes.
-Transfer with a metal spatula to a rack and chill (to cool quickly), about 5 minutes.

(Cookie recipe is from Epicure: Read More http://www.epicurious.com/recipes/food/views/Black-and-White-Cookies-106171#ixzz0mzV2yYXU)

FROSTING
1/3 Cup boiling water
4 Cups confectioner's sugar
1 oz bittersweet chocolate, melted

-In a large mixing bowl, stir the boiling water into confectioner's sugar. Stir until the mixture is spreadable.
-Separate the mixture into 2 bowls. One bowl will remain the "white" side. **This is the bowl where I added a few drops of vanilla extract for some flavor**
-In the second bowl, stir in the chocolate. **Since I was dying mine green, this is where I added white chocolate and food coloring instead of bittersweet chocolate**

When the the cookies are cool, frost them with flat side up. I frosted first the white side and then the chocolate side (the chocolate would cover up any extra white on the other side). Let the cookies harden. You can stack the cookies with wax paper in between and put them in an airtight container. ENJOY!